Our society is on high bug alert these days. There are those who fear microbes (the germaphobes) and those who swoop in with exciting cutting edge research for why germs are important for our wellbeing. The rest of us fall somewhere in between. Whatever our feelings are, the gut-brain axis – the imaginary line between the brain and the gut – undeniably is one of the new frontiers of neuroscience. With good reason. The state of the gut microbiome is key to human health, so let’s explore a fun way to feed our “second brain” with the help of fermentation.
Fermentation is a process during which bacteria convert carbohydrates into organic acids (e.g., alcohol), giving rise to new texture and flavor, staving off unfavorable bacteria, and thus preserving the food. Humans have relied on fermentation for thousands of years to preserve vegetables and fruits in season for long cold winter months. Fermentation not only helps the food last longer, but also packs a powerful punch of probiotics that improve digestion and metabolism, boost the immune system, aid weight loss, and even facilitate good mood through production of various neurotransmitters (Perlmutter and Loberg 2015). Fortunately the process of fermentation is simple, straightforward and typically doesn’t require specialized equipment, other than some essential warmth and darkness. Here at ZRT, many of us enjoy making our very own homemade fermented drinks, and in this blog we will share our employees’ favorite recipes.
Kombucha
My personal favorite fermented concoction is kombucha – the fermented tea. It’s simple to make, delicious, and oh so good for you. And did I mention you can keep up the cycle of continuous kombucha brewing? Beware however, the SCOBY (Symbiotic Culture Of Bacteria and Yeast) may be off-putting for beginners – alien-looking, rubbery, slimy, floating atop the brew - it’s the stuff you cannot get around should you commit to making kombucha. After the first round, I bet, you’re going to embrace the SCOBY as the coral reef of the bacteria and yeast of the world!
For a half-gallon batch, you’ll need:
Utensils:
- Large glass jar
- Wooden stirring utensil
- Tight-weave cloth
- Rubber band (to secure the cloth cover to the jar)
Ingredients:
- 3 quarts filtered water
- 1 cup organic white sugar
- 4 tea bags (experiment here – you can use black tea, green tea, white tea, and various combinations thereof with fruit teas)
- ½ cup kombucha from a previous culture (distilled white vinegar will work well also)
- SCOBY
Instructions:
- Boil water in a large pot. Add sugar, stirring until dissolved. Remove from heat and add the tea bags.
- Cool the mixture to 68-85o
- Remove the tea bags (or strain the mixture if using loose tea).
- Add starter kombucha (or vinegar).
- Add the active kombucha SCOBY.
- Cover the jar with cloth, secure with a rubber band.
- Allow the mixture to incubate at 68-85oF out of direct sunlight for 7-30 days (or to taste). The longer the kombucha sits, the less sweet and more tangy it will be.
- Pour the kombucha off the top of the jar for consuming. Retain the SCOBY and enough liquid from the bottom of the jar to use as starter tea for the next batch.
- Finished kombucha can be bottled and refrigerated.
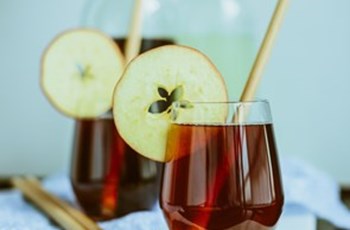
The Simplicity of Hard Cider
There are some great reasons to make your own hard cider to enjoy, rather than heading up to your local grocer to buy your favorite brand x beverage off the shelf. For starters, hard cider has lots of antioxidants…perhaps even more than that wine you’ve been drinking for your health. There are only 3 or 4 necessary ingredients, so you avoid the big commercial additives, like “injected apple aromas”, apple flavorings and good ole “preservatives”, whatever that might entail. Also, cider is naturally gluten-free, so if you have any sensitivity to gluten, give this a try. Once you have the process down, you can start adding other juices and fruits to the mix to get different ciders. Some common fruits or juices I have used to make terrific cider include: cranberry, pomegranate, blackberry and pear. – Jeff Jarrett.
What you’ll need:
- Fresh pasteurized apple juice – use the cloudy, unfiltered stuff that is free of additives & preservatives
- Wine yeast (WLP 720 or WLP 775 are great)
- Yeast nutrient (strengthens yeast during fermentation…basically B vitamins)
- Pectic enzyme (optional, but breaks down the natural pectins present in apple juice to help clear the end product)
Stages of making hard cider:
- Fermentation Stage (10–15 days)
- Clarification/Aging Stage (3-6 weeks, depending on preference)
- Ready for Bottling (ready in about 4 more weeks) or Kegging (ready in about 3 days)
Apple Jack and Kefir
Apple Jack is fall to me. You go out, you pick fresh apples, you make your own juice, and you get this wonderful spirit that’s very strong to say the least. The first time I had it was in a microbiology lab at the University of Idaho. It was one of our lab “experiments.” We decided to open it up and give it a shot to see if it was done. May I say it was a successful experiment! Drink responsibly straight out of the freezer.
Kefir, on the other hand is very low on alcohol. Kefir is tangy. It’s easy to make. It’s a lot of things. You can use it as a solid yogurt, or as a drink or a smoothie. You get to add what you want to it, so you’re not limited by the selection in the grocery store.
A great way to consume kefir is to mix it with apple jack and have an adult smoothie. –Ed Henson.
Apple Jack - what you'll need:
- 5 gallons fresh apple juice (no preservatives, no added sugar)
- 5 lbs brown sugar
- 1 packet brewer’s yeast
- 1 sealable 5-gallon container
- Fermenting airlock
- Large pan
Instructions:
- Sterilize your equipment.
- Heat one gallon of cider in a large pan over medium heat.
- Add sugar once cider reaches approximately 110oF, and stir until dissolved.
- Remove from heat source, cool slightly and add the brewer’s yeast.
- Add the remaining 4 gallons of cider to the 5-gallon container, followed by the cooled cider with the yeast.
- Seal the container with the lid/cap with the brewer’s airlock attached.
- Store in a cool dark place for 6-10 days.
- Bottle the applejack (for detailed instructions, please see the website).
- Freeze the applejack.
- Separate the frozen applejack from water.
Enjoy responsibly!
Kefir - what you'll need:
- 1 cup organic milk
- 1 tablespoon fresh kefir grains
Instructions:
- Add kefir grains and milk to a clean glass jar with a tight-fitting lid.
- Leave to ferment on the kitchen counter top out of direct sunlight for 24-48 hours. Gently rock/shake the container with fermenting kefir when you think of it.
- Once kefir starts to separate, it is finished!
Pear Mead Wine
Mead is simple to make. It takes about an hour of preparation in the kitchen, doesn’t require fancy equipment (you can, but you don’t have to) – you pick up all the items at the grocery store for very little money. Mead is unusual, delicious and makes a great gift! – Lindsay Nyre.
What you'll need:
- 1 gallon spring water (room temperature)
- 3 lbs pure unprocessed honey
- 1 bag balloons big enough to stretch over the mouth of the jug
- 1 package Fleishmann’s Yeast
- 1 box raisins (25 raisins to be exact)
- 1 orange
- 2 pears
Instructions:
- Pour about half of the water into a clean container.
- Slice the orange and the pears into thin slices and add to the jug along with honey, twenty-five raisins, and yeast. Pour some water back into the jug so the level is a couple of inches from the top, cap it and shake it up well. (If you can, shake it for a good five minutes. This will aerate the mixture for maximum yeast growth).
- Poke a pinhole in the top of the balloon, remove the cap from your jug and put the balloon right over the mouth of the jug. Stretch the open end of the balloon right over the jug so that as the gases form inside the jug they will inflate the balloon. Put a rubber band or tape around the neck to keep it firmly in place. Leave it out on a counter for the first day so you can monitor it.
(Note: The balloon can age and oxidize over time so you should inspect it regularly to make sure it doesn't break down and develop cracks. If it seems like it is breaking down replace it with a new balloon!)
What will happen next?
Somewhere between an hour and twenty-four hours later the balloon will start to inflate. This is a great sign that the yeast is transforming the contents of the jug into wine. Gases forming inside the jug will escape through the pinhole. If the balloon is getting big you may need to poke another hole or two in it. You don’t want it to burst. It would leave your mead open to contamination. Once you are satisfied that the gases are escaping and the balloon is not under unusual stress you can set the jug in a cool dry place like a kitchen cabinet or closet shelf. Check on it every day if you can just to make sure it is ok and the balloon hasn’t popped off.
After two to three weeks the major portion of the ferment will be done and the balloon will be limp. At this point you can taste a little bit to see how it is coming along but it isn’t really a tasty wine at this point. It will need another couple of months to start to get delicious. Over time, as you check on it you will notice that the cloudiness disappears and it slowly clarifies and transforms into wine.
The fruit can stay in the mixture for the whole duration but if you want to make the mead a little milder and help it clarify faster you can transfer the liquid into another gallon jug and place the balloon on that one. This would be after the two to three week ferment period has completed. This process is called racking and it will move your mead along nicely.
More ZRT Blogs
- Blog: 7 Tips to Making Your Own Blue Zone
- Blog: ZRT Docs Share Their Favorite Healthy Eating Summer Recipes
Literature Cited
Perlmutter, D. and K. Loberg. 2015. Brain Maker: The Power of Gut Microbes to Heal and Protect Your Brain - for Life. Little, Brown and Company, Hachette Book Group
